

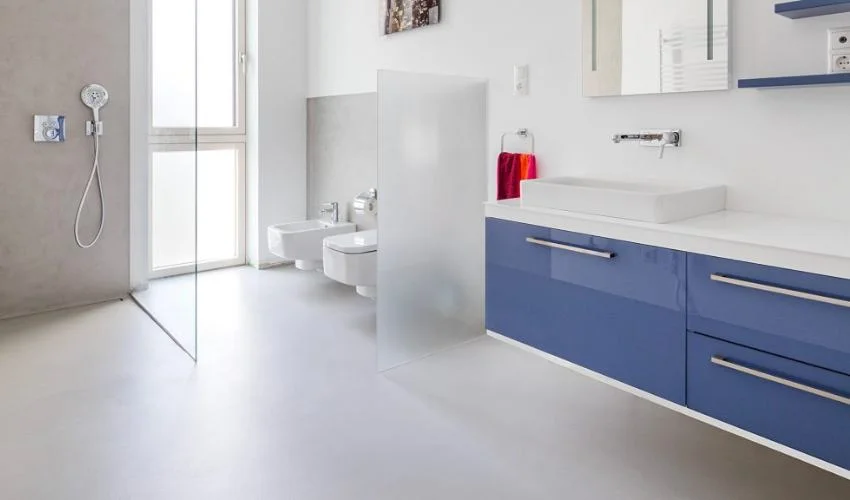
Few home improvement projects inspire as much quiet desperation as an outdated bathroom floor. Maybe you are staring down faded pink ceramic from 1982, stained grout that defies every chemical known to science, or beige squares that drag the entire room into the past. Tearing it all out sounds exhausting. A full demolition means jackhammers, clouds of crystalline silica dust settling into every bedroom closet, hauling heavy debris to an expensive rented dumpster, and praying your subfloor is not rotted underneath. Before you even purchase new tile, you are easily looking at thousands of dollars in labor and materials.
Against that backdrop, tile epoxy sounds like an absolute miracle. A quick stroll through home improvement forums or social media reveals sleek transformations completed over a single weekend for less than a hundred and fifty dollars. Two coats of glossy resin, and that tired surface supposedly morphs into a seamless, modern sheet resembling polished concrete or pristine porcelain.
The harsh reality of floor epoxy rarely matches the glossy photographs taken five minutes after the topcoat cures. While epoxying over ceramic or porcelain tile is certainly cheap upfront, whether it qualifies as a smart budget fix or an agonizing mistake comes down to chemistry, foot traffic, and the unforgiving physics of the modern bathroom.
The Allure of Tile Epoxy (And What the Kits Promise)
The marketing behind DIY tile resurfacing kits paints an enticing picture. Traditional bathroom floor replacements routinely run between three thousand and seven thousand dollars once you account for demolition, backer board installation, waterproofing membranes, setting mortar, tile, and labor. By contrast, a consumer epoxy kit or a pair of high-solids epoxy cans runs between seventy-five and two hundred dollars.
Manufacturers promise that these specialized coatings bond directly to glazed surfaces, leveling out shallow grout depressions to form a continuous, non-porous shield. The visual payoff can be striking on day one. Unifying the floor under a single, monochromatic tone eliminates visual clutter, hides permanently discolored grout lines, and brightens up cramped, windowless spaces.
For landlords prepping a rental between tenants, house flippers aiming for a cosmetic facelift, or homeowners trying to buy two years of visual sanity while saving for a gut remodel, the math seems indisputable. If it looks good and costs a fraction of a full remodel, why would anyone bother hauling a sledgehammer into their bathroom?
The problem is that a bathroom floor is not a display shelf. It is a punishing, hostile environment where chemical coatings face constant assault from moisture, temperature swings, and physical friction.
The Brutal Physics of a Bathroom Floor
To understand why epoxy frequently fails over tile, you have to look at what makes bathroom floors fundamentally different from the concrete garage floors where epoxy originally earned its industrial reputation.
Vitreous Glazes Resist Adhesion
Ceramic and porcelain tiles are manufactured by firing refined clays at temperatures exceeding two thousand degrees Fahrenheit. This process turns the surface into an impervious, glass-like sheet designed specifically to prevent anything from sticking to it or penetrating its pores.
Epoxy relies on two types of adhesion: chemical and mechanical. Chemical adhesion occurs when molecules in the resin cross-link with molecules in the substrate, which rarely happens with fired silicates. That leaves mechanical adhesion, where the wet resin flows into microscopic pits, valleys, and pores, anchoring itself as it hardens. Because glazed tile has almost no surface profile, the epoxy has virtually nothing to grab onto. Unless that factory glaze is thoroughly scuffed or chemically altered, the coating merely sits on top like a giant sheet of plastic film, waiting for a mechanical shock to release it.
Moisture Vapor Transmission From Below
Bathrooms constantly absorb and release water, but the real threat to epoxy does not come from splashes above. It comes from the vapor traveling from underneath.
Concrete slabs and even wood subfloors naturally breathe, expelling microscopic moisture vapor upward. Standard tiled floors accommodate this moisture because traditional cementitious grout is vapor-permeable; the moisture quietly evaporates into the ambient air. When you coat that floor with a non-porous epoxy membrane, you trap rising vapor beneath an impermeable barrier. As moisture accumulates, vapor pressure builds until it forces the epoxy away from the tile face, producing unsightly blisters and water-filled bubbles.
Thermal Expansion and Joint Movement
Every material expands when warm and contracts when cold. Tile, cured grout, thinset mortar, subflooring, and epoxy resins all expand and contract at completely different rates.
When you take a hot shower, the ambient temperature and humidity skyrocket in minutes. When you open the door, the room cools rapidly. These constant thermal cycles place immense shear stress on the bond line between the epoxy and the tile. Eventually, the coating gives way, cracking along the grout joints where structural deflection is most pronounced.
Where the Project Usually Goes Wrong
When an epoxy floor fails, it does not do so quietly. It tends to unravel in ways that leave the floor looking vastly worse than the ugly tile you started with.
The most notorious failure point is peeling around wet zones. The edges directly adjacent to a shower pan, tub skirt, or toilet base are prime candidates for water infiltration. Once a microscopic gap opens, standing water seeps underneath the coating through capillary action. The moisture loosens the adjacent bond, and within weeks, large sheets of rubbery paint begin tearing away when stepped on.
Another critical concern is safety. Smooth ceramic tile can be slippery when wet, but bare epoxy is exponentially worse. Without a carefully suspended anti-slip aggregate, a freshly coated bathroom floor turns into a skating rink the moment someone steps out of the tub with damp feet.
Staining presents its own set of headaches. Consumer-grade epoxies, especially budget water-based hybrids, are susceptible to chemical attack from cosmetic products. Everything from alcohol-based hairsprays and nail polish removers to body oils and colored bath bombs can soften, stain, or permanently mar the resin finish.
The Grueling Prep Work Required for Success
If you talk to professional floor refinishers who successfully apply resin systems over tile, they will all tell you the same thing: applying the paint takes one hour, while preparing the surface takes two days. If you attempt this project using the casual instructions found on retail packaging, failure is all but guaranteed.
Chemical Decontamination
Bathrooms accumulate invisible films of soap scum, paraffin wax from body washes, silicone residue from hair conditioners, and mineral scale from tap water. Normal household cleaners do not remove these contaminants; in fact, many leave surfactant residues that actively repel epoxy.
Surfaces must be stripped with industrial heavy-duty degreasers like trisodium phosphate, scrubbed repeatedly with stiff nylon or wire brushes, and rinsed until the wash water tests completely neutral. If a single drop of water beads up on the tile rather than sheeting flat, the surface is still contaminated with oils, and the epoxy will lift.
Mechanical Scarification
Because you cannot rely on chemical bonding, you must physically destroy the tile glaze. Wiping down the floor with a liquid deglosser is insufficient for a horizontal surface subjected to foot traffic.
The floor must be mechanically sanded using heavy sixty-grit to eighty-grit silicon carbide sandpaper or an orbital grinder fitted with a diamond cup wheel. The goal is to transform the reflective, smooth glaze into a rough, chalky, matte finish that feels like fine sandpaper to the touch. This generates intense, ultra-fine dust that requires sealed plastic containment, respirator masks, and HEPA vacuums.
Total Moisture Elimination
Even if the surface appears dry, the porous grout lines beneath the tile can hold moisture for days. Applying epoxy over damp grout guarantees adhesion failure.
After deep cleaning and rinsing, the room must be sealed and dried using industrial air movers and commercial dehumidifiers for at least forty-eight to seventy-two hours. Before rolling on a single drop of primer, a surface moisture meter should confirm that the grout and surrounding substrates are completely dry.
Product Selection: DIY Kits vs. High-Performance Resins
The specific chemical composition of your coating determines whether your floor lasts six months or six years. Most retail options fall into distinct categories, each with serious tradeoffs.
Water-Based Acrylic-Epoxy Hybrids
These are the single-part or low-odor two-part kits found on home improvement store shelves labeled as tub and tile paints. They are popular because they clean up with water, emit manageable odors, and roll out easily.
However, they dry to an exceptionally thin dry film thickness and have relatively low cross-link density. They scratch easily under normal foot traffic, soften quickly under pooled water, and degrade rapidly in high-humidity environments. Using a basic water-based kit on a bathroom floor is almost always a mistake.
100% Solids Two-Part Epoxy
True industrial two-part epoxy consists of a base resin and an amine curing agent that trigger an exothermic chemical reaction when combined. They contain zero solvents or water carriers, meaning the thickness you apply wet is the exact thickness that cures on the floor.
High-solids epoxies provide outstanding impact resistance, high compressive strength, and an impervious seal. However, they are demanding to work with. They feature strict pot-life windows, meaning you often have less than thirty minutes to spread the material before it begins curing in the bucket. They require specialized epoxy-rated roller covers that do not shed fibers, and they demand absolute precision when measuring mix ratios.
The Essential Topcoat: Polyaspartic or Aliphatic Polyurethane
Epoxy by itself is rigid and prone to ambering or yellowing when exposed to ambient light. More importantly, it scratches easily when walked on with street shoes carrying microscopic grit.
A durable floor requires a sacrificial topcoat. An aliphatic polyurethane or polyaspartic clear coat provides crucial flexibility, superior abrasion resistance, and chemical protection against household solvents. Crucially, this clear topcoat serves as the carrier for an anti-slip additive, such as aluminum oxide or micronized polymer beads, which gives the wet floor necessary traction underfoot.
Everyday Life on an Epoxied Bathroom Floor
Living with an epoxied bathroom floor requires shifting your maintenance habits. You cannot treat it like indestructible ceramic.
Standard rubber-backed or latex-backed bath mats can cause severe problems. The plasticizers used in synthetic rubber mats chemically interact with epoxy matrices over time, causing dark, unremovable yellow stains or literally softening the resin until the mat welds itself to the floor. Homeowners must switch to unbacked woven cotton rugs or elevated cedar duckboards.
Cleaning methods must also be overhauled. Traditional bathroom cleaners formulated with harsh abrasives, high concentrations of bleach, or acidic descalers will steadily dull a glossy epoxy surface and erode protective topcoats. You are limited to pH-neutral floor cleaners, micro-fiber mops, and soft cloths.
Dropped objects represent another persistent risk. If you drop a heavy glass perfume bottle, hair styling iron, or pair of metal grooming scissors, traditional ceramic tile might chip locally, but the surrounding surface remains intact. A sharp impact on an epoxied tile can crack the brittle resin layer, creating a localized fracture that allows water to penetrate underneath and trigger widespread delamination. Repairing these chips is difficult; patching epoxy leaves obvious seams that are impossible to blend invisibly.
Practical Alternatives to Consider
Before committing dozens of hours to the intensive preparation epoxy requires, consider whether other budget-conscious renovations might yield a more durable result for a similar financial investment.
Luxury Vinyl Plank or Tile (LVP/LVT)
Modern rigid-core luxury vinyl plank is waterproof, dimensionally stable, and specifically engineered to float over existing hard surfaces.
By skimming your existing tile with a fast-drying feather-finish compound to flatten out deep grout lines, you can lay high-quality click-lock vinyl directly over the old floor in an afternoon. It requires zero demolition, tolerates structural movement, provides natural slip resistance, feels warm under bare feet, and handles dropped objects without chipping. It costs only slightly more than a professional-grade epoxy and topcoat system while offering far greater durability.
Grout Restoration and Tile Deep Cleaning
Often, what homeowners despise about their tile is not the ceramic itself, but twenty years of stained, deteriorating grout. Professional-grade alkaline strippers combined with high-pressure rotary extraction can remove decades of embedded grime.
Once the grout is clean and dry, applying an epoxy-based grout colorant and sealer allows you to completely change the color of your grout lines from dirty gray to bright white or modern charcoal. The result refreshes the entire room for under fifty dollars without altering the indestructible factory glaze on the tile faces.
The Final Verdict
Epoxying over old bathroom floor tile is not an automatic disaster, but calling it a simple weekend DIY fix is disingenuous.
If you are dealing with a dry half-bathroom or powder room, possess the patience to execute meticulous mechanical grinding and multi-day drying, and invest in commercial-grade two-part resins topped with slip-resistant polyurethanes, epoxy can serve as a dependable, budget-friendly surface for several years.
In a full bathroom with daily shower steam, heavy foot traffic, and lingering moisture, relying on a budget epoxy kit is usually a messy mistake in slow motion. The intense labor required to prepare the tile properly equals the effort needed to install superior floating alternatives, and the risk of peeling, bubbling, and dangerous slips remains perpetually high. When long-term performance matters, save your time and energy: either embrace smart overlay flooring or hold out until you can pull up the old tile for good.