

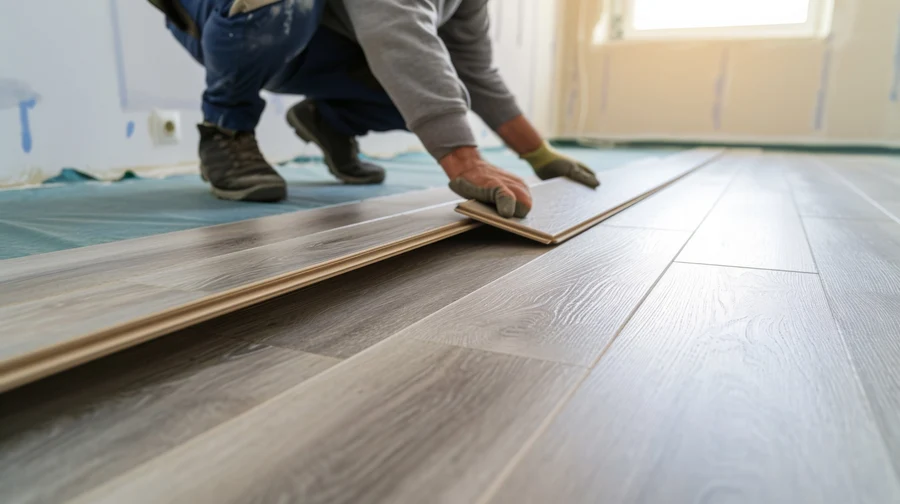
Staring down at a discolored, worn-out sheet of decades-old linoleum is one of the most familiar rites of passage in home renovation. Whether you have inherited a yellowed floral pattern from the late 1970s or a faux-tile sheet that has lost its luster, the immediate urge is to rip it out. Then you grab a putty knife, pry up a single corner, and realize what you are up against: rock-hard adhesive, shredded paper backing bonded permanently to the subfloor, and hours of grueling manual labor.
Naturally, the obvious question follows: Can you simply install modern laminate flooring directly over that existing linoleum and pretend it never existed?
The short answer is yes. In fact, professional flooring installers often prefer leaving sound linoleum in place rather than tearing it out. Linoleum makes an exceptionally stable, flat, and quiet base for floating laminate planks. However, treating old linoleum as an automatic free pass can backfire spectacularly if you skip the prerequisite checks. Installing laminate over an unstable, uneven, or moisture-compromised sheet floor will ruin your new investment within months, causing popped joints, hollow clicks underfoot, and buckled boards.
Before you start laying planks, you need to understand when old linoleum works in your favor, when it presents hidden hazards, and how to prep the surface so your new floors last for decades.
Why Keeping the Old Linoleum Is Often the Smarter Move
Demolishing an old resilient floor is rarely straightforward. Depending on when the flooring went down, the adhesive was designed to fuse permanently with the plywood or concrete below. Scraping it up often leaves the underlying subfloor gouged and splintered, requiring extensive repairs before any new material can be installed.
Leaving the linoleum right where it sits provides several distinct advantages that go well beyond saving your back and your weekend.
First, old sheet flooring functions as an auxiliary moisture and sound barrier. Because resilient flooring forms a continuous sheet across the room, it dampens impact noise and footfall vibration, reducing the hollow, click-clack resonance often associated with laminate. It also prevents minor drafts from seeping up through subfloor board seams.
Second, skipping tear-out saves substantial disposal and supply costs. You avoid renting heavy floor scrapers, buying chemical adhesive removers, and paying landfill tipping fees for heavy trash bags filled with stubborn vinyl fragments.
Finally, there is the critical issue of hazardous materials. Many older resilient floors—particularly sheet flooring and nine-inch tiles installed before the mid-1980s—contain asbestos in the felt backing or in the black cutback adhesive used to glue them down. Dry scraping or sanding these materials releases microscopic asbestos fibers into your home’s air, creating a severe health hazard.
Leaving asbestos-containing flooring intact and encapsulating it beneath a new floating floor is widely recognized by environmental health agencies as the safest management method. As long as the material remains undisturbed and sealed beneath the laminate, it poses no threat to your household.
The Physical Checklist: Does Your Floor Actually Qualify?
You cannot simply toss laminate planks over any linoleum surface and hope for the best. Laminate is a floating floor system, meaning the planks lock together at their edges without being glued or nailed to the substrate. For the click-lock mechanism to endure thousands of footsteps, the foundation beneath it must meet strict physical standards.
Subfloor Flatness Versus Surface Smoothness
Homeowners frequently confuse a smooth floor with a flat floor. Your old linoleum might feel smooth to your hand, but that does not mean it is flat. Linoleum is a flexible material that mirrors every dip, crown, and sag in the structural subfloor beneath it.
Laminate flooring tolerances are unforgiving. Most manufacturers require the subfloor to be flat within three-sixteenths of an inch across a ten-foot radius, or one-eighth of an inch across a six-foot span.
If your linoleum drapes over a low spot in the room, the floating laminate planks will bridge over that gap like a tiny suspension bridge. Every time someone walks over that spot, the planks will deflect downward. Over several months, that repeated bending puts extreme shear stress on the thin tongue-and-groove locking profiles, eventually snapping the joints and leaving permanent gaps between the boards.
Take an eight-foot or ten-foot straightedge (or a long builder’s level) and sweep it across the room. Look for daylight beneath the edge. Any depression greater than three-sixteenths of an inch must be addressed before proceeding.
Adhesion and Structural Soundness
Walk the entire room slowly, paying attention to what your feet feel and hear.
The linoleum must be firmly bonded across the majority of the floor. If you feel squishy spots, notice large bubbles where the sheet has lifted, or hear crackling sounds where dried adhesive has failed, the floor is unstable. A shifting base under a floating floor causes unpredictable movement, squeaks, and premature wear on the locking joints.
Pay special attention to the perimeter, doorways, and the zones directly in front of the sink, dishwasher, and refrigerator. These high-traffic, moisture-prone areas are where edges commonly lift, curl, or crack.
Cushion and Firmness
True vintage linoleum—made from linseed oil, pine resin, and wood flour on a jute backing—is remarkably dense and hard. Vintage sheet vinyl is similarly firm.
However, some mid-range vinyl floors from the 1980s and 1990s featured thick, cushioned foam backings designed to feel soft under bare feet. Cushioned sheet flooring is a major hazard for laminate. If your existing floor has noticeable bounce or squish when you press down with your thumb, it provides too much deflection. Laminate requires a firm, rigid substrate; laying it over spongy vinyl causes the joints to flex excessively and fail.
Moisture and Odor Inspection
If the linoleum is installed in a kitchen, laundry room, or over a concrete basement slab, inspect it closely for signs of chronic moisture.
Musty odors, dark discoloration creeping through the seams, or white mineral deposits around edges indicate water intrusion. If the wood subfloor beneath the linoleum has rotted from an old plumbing leak, covering it with laminate will not solve the problem. It will trap the moisture, accelerate structural rot, and encourage mold colonies to thrive in the dark space beneath your new floor.
The Hidden Trap: Finished Floor Height and Clearances
One of the most commonly overlooked factors in laying flooring over flooring is the change in finished floor height. A quality laminate plank is typically between eight and twelve millimeters thick, plus an additional one to two millimeters for underlayment padding. Adding roughly half an inch to your existing floor alters how the room interacts with adjacent architectural features.
The Dishwasher Dilemma
In kitchen installations, this is the classic homeowner trap. When a kitchen was originally built, the dishwasher was slid into place on top of the original subfloor or single layer of linoleum, fitting snugly beneath the standard thirty-six-inch countertop.
If you lay laminate directly up to the front legs of the dishwasher, you create a recessed well. The next time that dishwasher needs servicing or replacement, you will find it physically trapped beneath the countertop lip, blocked by the raised height of the new flooring.
To avoid this, you must run the new laminate all the way under the dishwasher bay, or pull the appliance out, elevate its leveling feet, and reinstall it on top of the new floor plane. Confirm in advance that your countertop provides enough clearance for the appliance to adjust upward.
Door Swings and Trim Undercuts
Adding half an inch of flooring changes how doors open and close. Interior doors that previously cleared the linoleum with room to spare may drag or bind against the laminate. You will need to take doors off their hinges and trim the bottom rail with a circular saw.
Similarly, door casings and jambs must be undercut so the new laminate can slide neatly beneath them with room for seasonal expansion. A dedicated jamb saw or an oscillating multi-tool laid flat on top of a scrap plank makes quick work of this task.
Room-to-Room Transitions
If the adjacent hallway or dining room already has hardwood or tile that sits flush with your current linoleum, adding laminate will create an elevation step. You must plan for appropriate transition moldings, such as reducer strips, to prevent an abrupt vertical lip that creates a permanent tripping hazard.
When You Have to Tear It Out
While encapsulating linoleum is convenient, there are situations where demolition is unavoidable:
-
Multiple existing layers: If you inspect a floor cross-section at a heating register and discover two or three layers of flooring already stacked like a deck of cards, you cannot add another. Building codes and flooring manufacturers strictly forbid installing over multiple resilient layers because the cumulative soft layers create excessive movement.
-
Extensive bond failure: If more than twenty percent of the sheet is bubbling, lifting, or peeling, repairing the damaged sections takes longer than removing the entire floor.
-
Subfloor structural damage: If the subfloor flexes significantly under your weight, squeaks constantly, or shows signs of rot from past flooding, the linoleum must come up so the framing or subfloor panels can be reinforced or replaced.
-
Irresolvable clearance issues: If raising the floor height prevents exterior doors from opening or drops cabinet-to-counter clearance below usable limits, starting from bare subfloor is the only viable path.
How to Prepare Old Linoleum for Laminate
If your floor passes inspection, proper preparation makes the difference between an amateur-looking result and a professional-grade installation.
Step 1: Strip Wax, Grease, and Residue
Old kitchen floors accumulate layers of cooking grease, floor wax, and cleaning chemical residue. If left alone, these substances can harbor odors or react with the underlayment material.
Scrub the linoleum thoroughly using a heavy-duty degreaser or a commercial wax stripper. Rinse the floor with clean water and allow it to dry completely.
Step 2: Repair Damaged Spots and Air Bubbles
Do not leave curled edges or large air blisters untouched.
For air bubbles, take a sharp utility knife and cut an “X” through the center of the bubble. Peel the flaps back, scrape away any crumbling adhesive underneath, apply a small amount of heavy-duty construction adhesive or vinyl seam repair glue, press the material flat, and weigh it down with heavy paint cans or books until cured.
If edges along the walls or seams are curling upward, slice away the curled lip entirely using a utility knife. It is better to create a clean, flat gap than to leave an elevated ridge that pushes upward against the laminate.
Step 3: Skim-Coat Depressions, Seams, and Deep Textures
Many vintage linoleum floors feature deep embossed patterns, such as faux grout lines or pebble textures. While minor texture will not affect laminate, deep grooves can telegraph through underlayment or cause uneven pressure points.
Mix a batch of polymer-modified, cement-based feather-finish patching compound. Using a flat steel trowel, apply a thin skim coat over any deep seams, sliced-out damaged areas, and low depressions identified during your straightedge inspection.
Feather-finish compounds dry quickly—usually within thirty to sixty minutes—and create a smooth, hard taper that blends perfectly into the surrounding floor. Once dry, scrape off any high ridges with a stiff putty knife.
Step 4: Choose the Correct Underlayment
Most laminate planks come with a pre-attached foam or felt underlayment pad. If your planks have this integrated backing, you should never add a second layer of foam underlayment. Doubling up on padding creates a trampoline effect that causes the locking mechanisms to bend and snap.
However, consider your moisture requirements based on the structural subfloor beneath the linoleum:
-
Over a wooden subfloor: If the linoleum sits on plywood or oriented strand board (OSB) above a dry, conditioned basement or crawlspace, no additional moisture barrier is needed. The linoleum acts as an effective vapor retarder on its own.
-
Over a concrete slab: If the linoleum is glued to a concrete slab on-grade or below-grade, moisture vapor can migrate through microscopic pores in the concrete and unbonded linoleum seams. In this scenario, flooring manufacturers almost universally require a dedicated six-mil polyethylene vapor barrier laid over the linoleum before installing laminate, even if your planks have attached padding. Tape all seams with moisture-resistant vapor tape.
Key Installation Practices for Maximum Durability
Once the linoleum is prepped and flat, installing the laminate follows standard best practices, with a few specific priorities:
Acclimation is essential. Bring the unopened laminate boxes into the room at least forty-eight hours prior to installation. Laminate cores are made of high-density fiberboard (HDF), which expands and contracts with changes in ambient temperature and relative humidity. Installing cold, unacclimated planks directly over an old floor will lead to buckling as the boards adjust to the room’s living conditions.
Maintain a strict perimeter expansion gap. Laminate must be allowed to move freely as seasons change. Maintain a three-eighths-inch expansion space along every perimeter wall, cabinet base, and vertical obstruction. Use plastic shims to keep this gap uniform during installation. If the flooring pinches tightly against a wall or door frame, the entire field of laminate will rise off the linoleum, creating large, springy humps across the center of the room.
Stagger your joints properly. Never allow the end joints of adjacent plank rows to align closer than eight to twelve inches from each other. Proper staggering distributes weight evenly across the surface and prevents lateral pressure from concentrating along weak fault lines.
A Reliable, Long-Lasting Upgrade
Installing laminate flooring over old linoleum is not a lazy shortcut; when executed with care, it is a practical, cost-effective renovation strategy. By taking the time to verify flatness, eliminate loose edges, feather out depressions, and account for vertical clearances, you avoid the messy, hazardous ordeal of tearing up glued-down flooring.
The secret lies entirely in the prep work. When your old linoleum is solid, clean, and flat, it provides a dependable foundation that allows your new laminate to look exceptional, sound quiet, and perform flawlessly for years to come.